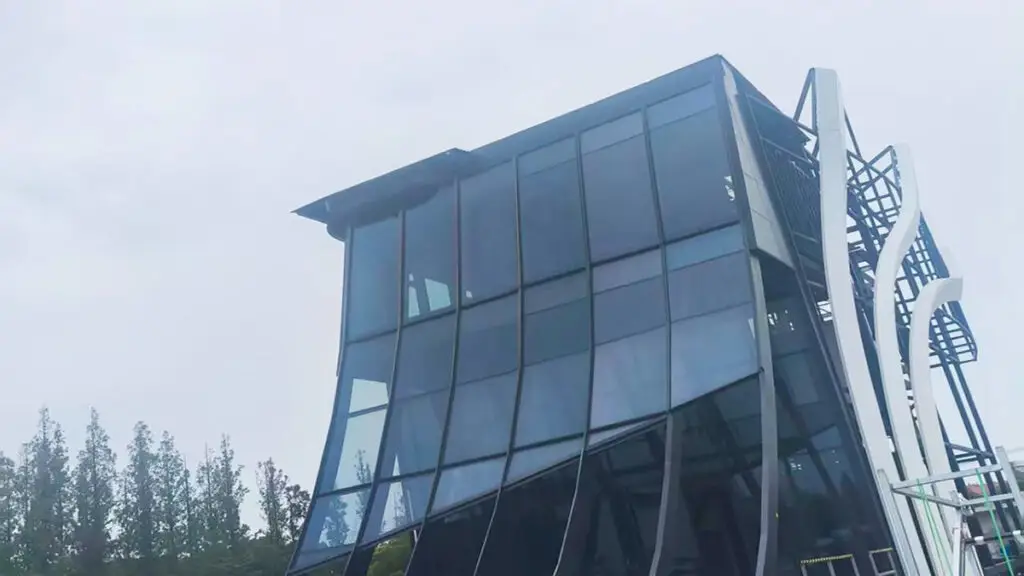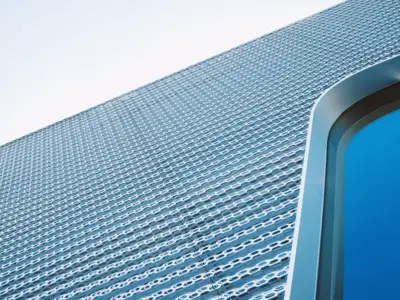
On buildings and objects around the world, it’s becoming more common to see printed glass. Whether a company or individual is looking to add branding, artwork, or a simple pattern to their building or sign, this can all be achieved through digital printing glass.
Digital printing glass allows architects and designers to create distinctive designs that will set the building conspicuous from anything else. Today we’re going to look at the digital printing process on glass and the potential performance defects this can result in.
What is digital printing glass?
Digital printing is used on the interior and exterior of buildings for commercial and architectural purposes. It can also be used on smaller items, such as glasses, signs, and much more.
A couple of different methods can be employed when it comes to digital printing glass, including UV-curable and digital ceramic glass printing. Digital printing involves adding your image or logo to a computer, which is then sent to print in the same manner as you would a piece of paper.
These methods allow a company or individual to have any digital image placed onto a sheet of glass, which can include almost any color. We will take a deeper looker into these two printing methods shortly, as they offer different durability levels.
In the past, screen printing was used instead of digital printing, and this technique has been used for decades. While it can install on the interior and exterior, it’s limited to some primary colors. The process involved with this type of printing is highly time-consuming, so digital printing is more commonly used today.
Digital printing offers a much more comprehensive range of colors, which is why we see incredible designs on buildings around the world today. As glass printing technology has continued to develop, it’s now used to advertise and decorate buildings or objects. Glass of any shape and size can be used for digital printing so that it can create signs, objects, and doors.
Digital Glass Printing Production Process
As we mentioned above, there are two different options when it comes to digital printing on glass. We’ll separate the two to review their production processes below.
UV-Curable Printing Production Process
- The glass pane or item is ready for the printing process.
- The image or pattern that’s to be printed onto the glass transferred to the computer.
- Organic inks are used to print a design onto the surface of the glass.
- Ultraviolet light is then used to dry the ink onto the surface of the glass.
Throughout this process, organic ink is used, which the UV light then dries onto the surface of the glass pane or object. The color options with UV-curable printing are unlimited on glass, and the colors are of excellent quality once printed.
It’s a speedy and easy process to undertake, which is why it’s so commonly used for digital printing on glass today. However, digital UV printing only creates a thin layer on the top of the surface of the glass, as opposed to fusing the color into the glass itself.
Digital Ceramic Printing Production Process
Another option that offers similar results is digital ceramic printing. This process uses a mixture of inks and ceramic frit, which features tiny particles of glass. After the printing is complete, these will be fused onto the glass, so the color is part of the glass itself.
- The frit and pigment are mixed in preparation for the printing to begin.
- An image or pattern is then sent via the computer to the printer and printed onto the glass.
- The ink dries to create a layer on top of the glass.
- The final stage is to make the fired ink layer, which encourages fusion and densification of the glass.
Digital ceramic printing is becoming a popular option thanks to its versatility and unlimited possibilities for designs. It’s quick and easy to set up and print, and bold and bright designs can be used on buildings or glass objects. When used on buildings, it offers many benefits such as reduced glare, light diffusion, and solar control. It’s also a more environmentally-friendly option and uses less energy in comparison to traditional glass printing processes.
Pre-Treatment for Glass Printing
Before either of these methods can be employed, it’s vital that the glass is prepared for the printing process. glass is a versatile material that’s relatively easy to print onto, however, it can quickly gather debris and dust when not protected. If these are present, it’s much more challenging to print onto the surface, and the chance of the pattern or design staying in place is reduced.
When it comes to UV printing on glass, there are a few different pre-treatment options. A simple primer wipe can be used to prepare the surface, and this is one of the cheapest and quickest options. A towel or rag is dampened, and then the operator will manually wipe it over the glass.
Flame treating burns off the colder end coating and is the most popular option. The glass is wiped down, to begin with, and then heat is used to increase the energy on the surface of the glass. This makes it more adhesive so that the ink will stay in place with ease during the printing process. Products such as Pyrosil are used in conjunction with this form of treatment and add a silicone coating to the glass.
Finally, plasma pre-treatment is another option, but it’s used less often due to the associated cost. Plasma detaches any dust and debris from the surface of the glass, and this process is very environmentally friendly and effective.
As technology continues to advance, plasma is becoming a more affordable option, which is expected to be used more commonly in the future. This treatment results in a boldly printed image that will last for many years.
Preparing an Image for Digital Printing
When preparing for digital printing, you’ll need to ensure your image is suitable for the task at hand. Digital printing can generally be undertaken on glass that’s up to 19 mm thick. Depending on the company you are using, there are various size options. If you are looking to create a huge display or wall of glass, tiles may be used to break down the process into smaller sections.
UV-curable printing allows for incredibly high-quality photos to be printed onto the glass item or pane. You’ll want to double-check what resolution the company you are using requires for the printing process, but they should be able to adjust and process your photo or logo accordingly. As everything is done digitally today, a file can be emailed across from your computer, and this can be used to start the process.
Quality Defects of Digital Printing on Glass
While digital printing can create a stunning effect on buildings or glass objects, drawbacks still exist though. These are some of the most common quality defects and issues that occur with digital printing. While these can sometimes be avoided, most of the time, when the item is severely damaged, the only option will be a replacement.
Distortion
Before the printing process is even complete, one of the first issues often occurs, which is distortion. When the image ratio is incorrect, the quality is affected, leading to a stretched or strange-looking final result.
The team who are processing your image should point out if there is an issue before you get started. They should ensure that it’s adjusted to the correct format to minimize the chance of this happening. However, if you provide them with a low-quality and distorted image upfront, it’s going to appear this way on the glass.
Scratch
While digital ceramic printing stops the image itself from being scratched off, as it’s embedded into the glass during the process, UV-curable printing doesn’t always have the same benefit. With either of these options, the glass itself could also become scratched, resulting in a distraction from the beautiful image you had printed.
Once you have a piece of printed glass, try to keep it away from areas in your home or commercial property that are often touched. These high footfall areas are far more likely to result in the scratched glass. When it comes to the glass itself, a scratch generally won’t damage the structure, but you’ll want to ensure it doesn’t crack or become any deeper.
Fading and Chipping of the Image
In order for fading to be avoided, this issue needs to be considered from the very start of the production process. The only way to avoid long-term fading is for the glass to be prepared in one of the three methods we discussed earlier. When this stage is skipped, it’s far more likely that the image will fade or chip off as time progresses.
When the surface of the glass has oil or dust on it, the image won’t stick to it correctly. Even a simple fingerprint or smudge can minimize the chance of adhesion, causing long-term quality defects.
UV-Curing
When using UV-curable printing, there’s a chance that the UV-curing process won’t be effective. This is determined by a number of factors, which add up to make or break this stage of the process. When any one of these issues occurs, you’ll find the chance of the image permanently staying on the surface of the glass quickly reduces.
Firstly, UV lights come in a wide range of intensities, and while some may be a more cost-effective option, they are generally much lower in power and slower to create the necessary results for digital glass printing.
Moreover, when an old bulb or the incorrect type of UV-light bulb is used, this can have a significant effect on the process, potentially rendering it useless. Of course, this can easily be resolved by switching out the bulb for a new and correct one.
Finally, the distance between the glass and the UV light is essential to get correct. When the distance is increased, the time it takes to complete the process increases dramatically and also reduces energy efficiency at the same time. The light should be as close as possible to the surface without risking overheating during the process.
Testing for Digital Printing on Glass
Digital printing companies should thoroughly test your digitally printed product before the process is completed. The ASTM International Standards Organization has a series of requirements for UV digital printing. You won’t necessarily experience every test during a single printing session, but a combination of these tests is often used.
Tape
This is the simplest option for testing adhesion on glass, and you’ll need a piece of sticky tape to complete the process. The tape is applied to the glass and firmly pressed onto the surface. It should then be peeled off at a 180-degree angle to see if any of the ink comes off the glass. Absolutely no ink should be present on the tape once it’s removed, so the object only passes if this is the case.
Crosshatch A Adhesion Test
To test deeper into the surface of the glass, a razor is used to make an X-shaped cut into the glass. From there, the tape test that was described above is repeated, once again at a 180-degree angle. The pass criteria are exactly the same, and no ink or color should be present on the tape once it’s removed.
Crosshatch B Adhesion Test
For this test, you’ll need a multi-tooth adhesion cutter. This is placed along with the glass and runs along for about one inch of the surface. Another cut is then made to cross the original cut at a 90-degree angle. Tape is once again used to complete the process.
Scratch Test
A unique tool is used to conduct a scratch test, which is called a sclerometer. You’ll move the device to 8 Newtons and then place it perpendicular to your glass object. When it’s dragged downwards through the image or design, absolutely no ink should come off during the test.
These tests don’t necessarily measure the quality of the printing and test that the printing is of a good level that it won’t easily be removed. Further tests could be performed if necessary, which is usually recommended for larger digital printing projects, such as walls and doors.
A good digital glass printing company will offer you tests upon the completion of the work and shouldn’t be afraid to show you the results and testing process they use.
Benefits of Digital Printing Glass
While screen printing glass was the most commonly used option in the past, there are many reasons why digital glass printing is now considered to be the far superior option for consumers. The number one reason clients prefer this method is that the possibilities for adding your image or logo are increased. Almost anything can be added to glass via this form of printing, so your options are unlimited.
The frit used in digital ceramic printing ensures the image doesn’t scratch off, which was a common issue with screen printing. Screen printing adheres to the image to the glass, whereas digital ceramic printing makes the image become part of the glass. It reduces the chance of fading or removal in the future, but the glass will need to be appropriately prepared to ensure there is no risk of this.
Digital printing is a much more cost-effective option and is excellent for companies looking to place large orders or create large custom pieces of glass. The color options are fantastic, and you’ll find your image is reproduced much more closely than it would be with screen printing. The high-resolution printing options mean the details on your logo or photo are replicated on the glass.
Digital Printing On Glass – Endless Options for Your Business
Digital printing on glass is being used more and more by companies today. Whether you are looking to create a sign, glass products, or a larger artwork display, it’s an excellent option for a long-lasting and high-quality printing process. As this technology is being used more commonly, expect prices to continue to drop and interest to increase in this form of printing.
When using digital printing on glass, ensure the glass is properly prepared beforehand. While it can be tempting to speed up the process in any way possible, this often results in inferior finished products and further damage down the line. You’ll also want to ensure the image you provide to your printing company is of top quality so that it can be replicated on the glass.
If you have any questions about digital printing on glass, please contact us by phone or email. We would be more than happy to answer any concerns you may have and give you more information to understand the options this form of printing could offer your business or home this year. It’s a versatile and exciting solution to spruce up any building or piece of glass that you are sure to notice more in homes and offices in the future.